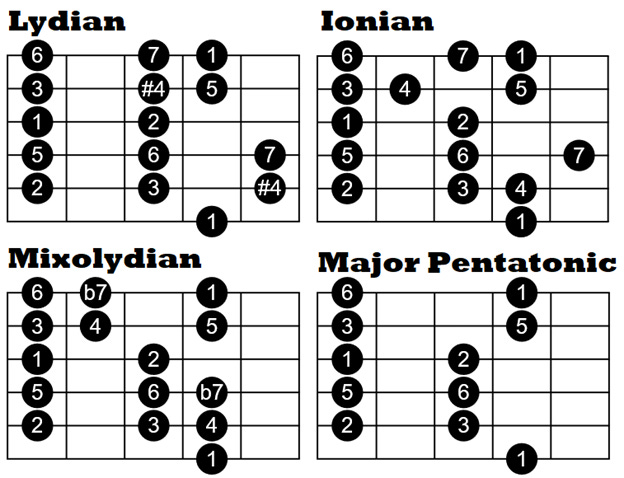
Below are the diagrams that you can reference along with the video. Guitarists, if modes are new to you then learn just the top three string of one mode first. That’s all I use in the video when improvising melodies because it gives me one full octave. When you are ready to add in the lower three strings, then add them in as their own shape. This way you can learn one octave for one mode at a time and not be pressured to learn all of this at once.
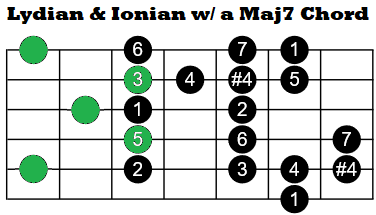
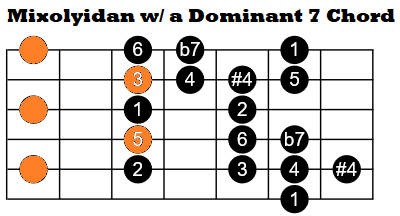
To use each diagram, just find the note you want to be the first degree (or tonic note) on the third string and set the pattern to that note. You can also work the same pattern from the first and sixth strings because they also have the first degree note. To help you out F Lydian’s third string tonic note starts on the 10th fret, C Ionian’s third string tonic starts on the 5th fret, and G Mixolydian’s third string tonic can be found on the 12th fret or at the nut with all open strings.
Try playing each pattern from the same position to really hear the difference between each mode. Since C Ionian’s third string tonic note is on the 5th fret, we can play C Lydian and C Mixolydian from the 5th fret as well to get a better sense of what the #4 and b7 degrees sound like.
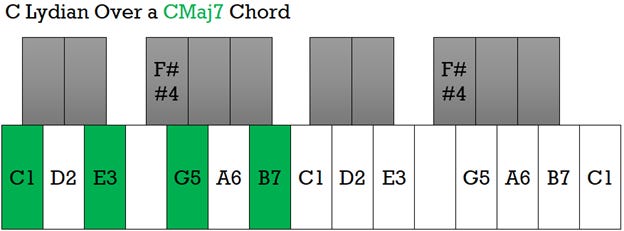
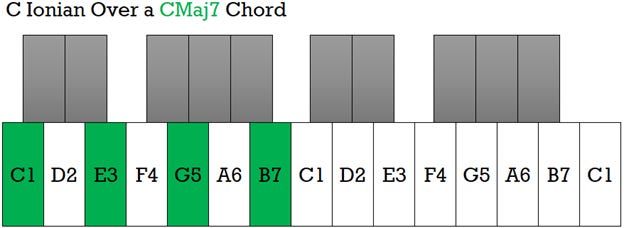
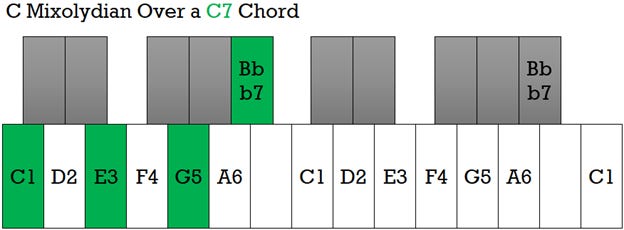
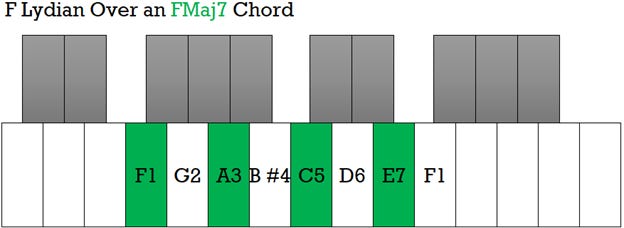
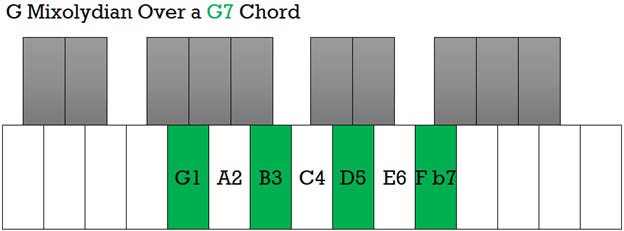
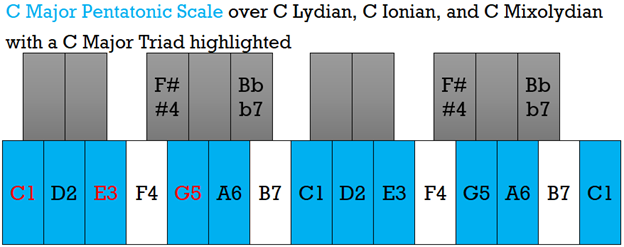
Pianists, your diagrams will have the same major modes highlighted on the keys. Each note will also have the degree of the mode listed just like in the guitar diagrams. The final diagram shows the Major Pentatonic Scale over Lydian, Ionian, and Mixolydian with a C Major Triad highlighted. This will take all of the concepts discussed in the video and over lay them into one chart. Keep focusing on degrees to give you the sound of each mode and listen for the tensions that degrees 4, #4, b7, and 7 create for you.
Until next time!




Share this post